
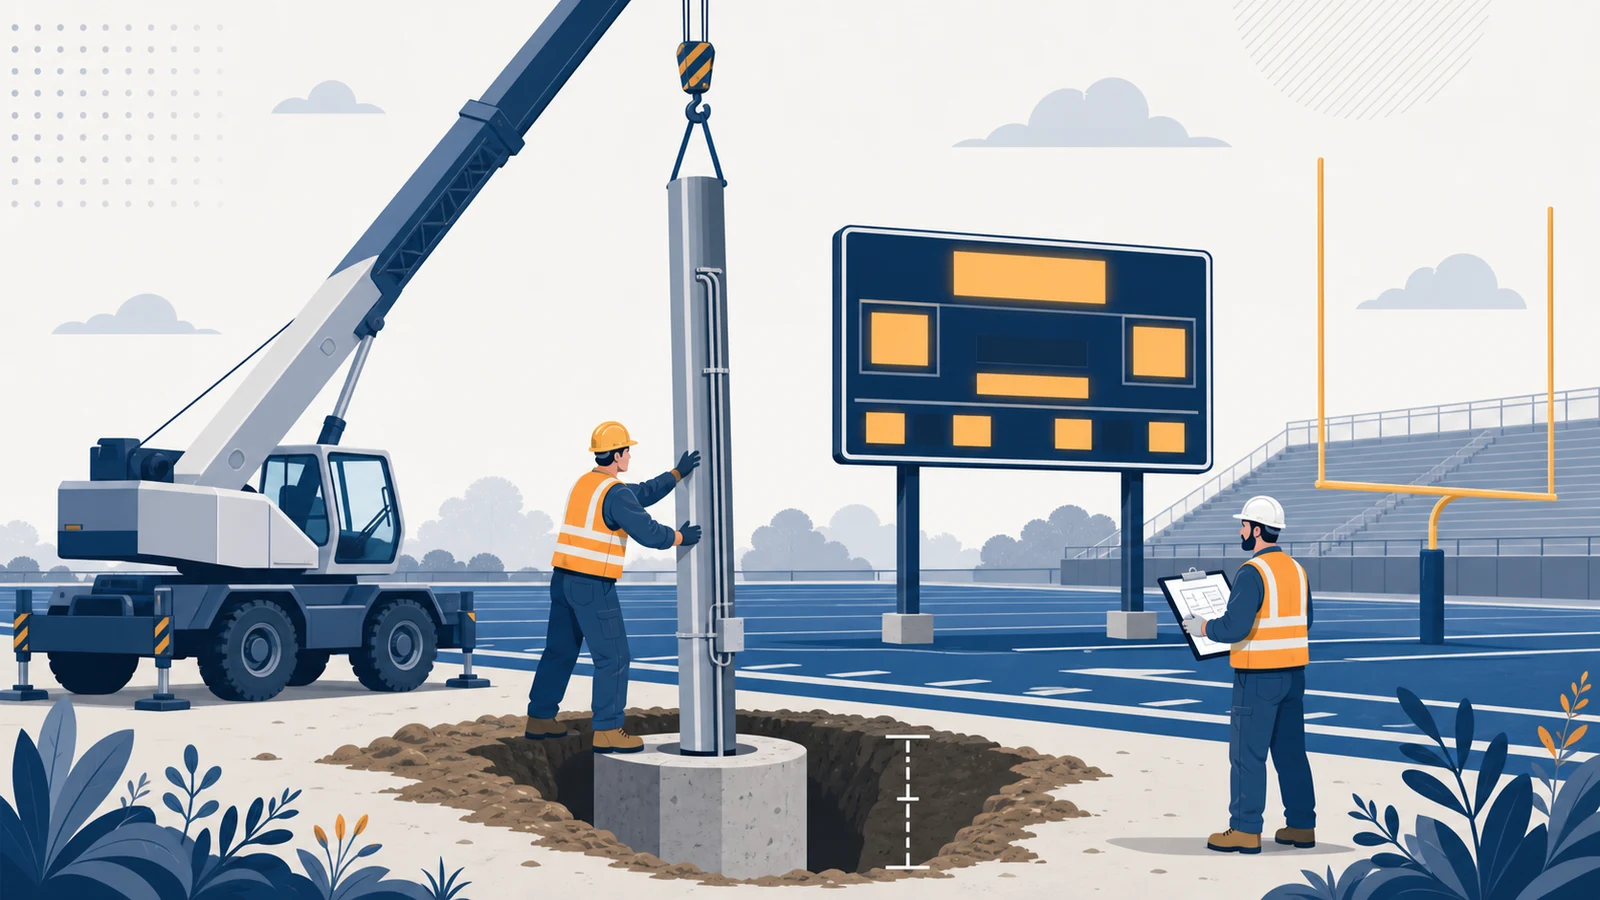
Installing a football scoreboard is a sign-erection job with two specific requirements: posts the mounting clamps fit, and footings sized for the wind at your site. Everything else is standard practice for a competent sign installer. This guide sets out what the factory supplies, what the site has to provide, and the sequence the owner's manuals lay down - including the details most often skipped.
Quick Answer
The short answer: two steel posts set in concrete footings, spaced to the dimension the model's manual specifies, with a cross-section that fits inside the mounting clamps supplied. The clamps attach the cabinets without welding, drilling or fabricating brackets on site, and tighten with a 3/4-inch SAE wrench. Footings are sized by the surface area of the sign and the local wind load requirement rather than by the weight of the cabinet. Once the concrete has cured, the installation is commonly a single day's work.
What Comes From the Factory, and What Does Not
The division is cleaner than most buyers expect, and knowing it prevents the two classic surprises - ordering materials that arrive in the crate anyway, and assuming the factory supplies something that has to come from a builder's merchant.
- Supplied: the cabinets and the mounting clamps. On a large football scoreboard that means eight mounting clamp assemblies, designed so the cabinets attach to properly sized and positioned posts without welding, drilling or fabricating brackets on site.
- Supplied: the console and its cabling arrangement. Along with a junction box where the order is configured for hardwired data.
- Not supplied: the posts. Two of them, to a specification the manual sets out.
- Not supplied: concrete, tools or the lift. Digging, mixing, pouring, keeping posts aligned while the concrete sets, and lifting the cabinets are all site work.
- Not supplied: the electrical connection. A locally licensed electrician terminates power at the panel.
Electro-Mech's own recommendation, printed in the manuals, is to find a reputable sign installer with the equipment and experience for that work - and if you do not know one locally, to ask the scoreboard sales representative for a recommendation.
Choosing the Location
The manuals name two factors, and both are cheaper to get right on paper than in concrete.
Accessibility means how easily people, equipment and cabling reach the scoreboard during installation - and how easily they reach it for service afterwards. A display on a tall, steep embankment or backed against dense woodland adds cost to the installation and to every service call for the next fifteen years.
Visibility means how easily spectators, participants and the operator can see the face. Every field is different, but the manuals give one piece of directional advice for the United States: put the scoreboard on the south or west side of the field, facing north or east, which keeps the setting sun off the face during afternoon games. The general version elsewhere is simply to avoid facing the sun.
On distance, the manuals are explicit about the arithmetic. The sign industry rule of thumb is 50 feet of viewing distance per inch of character height for lighted characters; Electro-Mech recommends 25 feet per inch instead, because a scoreboard has captions to read as well as digits. A model with 24 in. and 18 in. digits can comfortably be read from 450 feet on that basis, and a field needing several hundred feet more than that may require a customised display.
The Posts
The posts are the one structural component the site provides, and the scoreboard imposes two conditions on them: they must be strong enough for the load, and they must fit inside the mounting clamps.
For a large football cabinet the manual gives the specifics: two posts positioned twelve feet apart centre to centre, with each post's cross-section - width and depth - no greater than 7-1/2 inches. Spacing differs by model, so confirm the figure in the manual for the scoreboard you are installing before anything is dug.
Post types the manual names as good choices:
| Post type | Dimension |
|---|---|
| 6-inch Schedule 40 steel pipe | Actual outer diameter 6.63 in. |
| W6x25 I-beam | 6.08 in. wide, 6.38 in. deep |
| 7-inch square or box tube | Walls at least 1/4 in. thick |
Beyond fitting the clamps and carrying the load, the shape and material do not matter to the scoreboard. What does matter is that the posts are the right size before the holes are dug, because a post that will not fit the clamps is discovered at the worst possible moment.
One more note from the manual worth acting on early: if your project involves additional ID panels, or you have an existing structure and want the position or size of the mounting hardware changed to suit it, tell the factory before the cabinet is built. That is straightforward at the factory and awkward afterwards.
Footings, and What Sizes Them
The single most useful thing to understand about a scoreboard footing is what it is designed against. It is not the weight of the cabinet. It is the surface area of the sign and the wind load requirement where you are - and, as the manual puts it, the taller the sign, the larger the posts and footings need to be.
Two consequences follow. A wide, relatively light scoreboard can require more substantial footings than a narrow, heavy one. And coastal wind ratings drive deeper footings far more often than cold winters do, which surprises people who assume frost depth is the governing factor.
Because the requirement is local, the footing design belongs to whoever knows the local code - a sign installer who works in your county, or an engineer where one is required. The manufacturer's dimensions and details apply to the standard configuration of a particular model, and the manuals ask you to verify with the factory that you have the right documentation for your specific project before buying materials or digging.
The Installation Sequence
The order below is the one the outdoor manuals set out. The steps most often skipped are the ones that cost time when they go wrong.
- Dig the holes for the footings.
- Lift the posts into position and build temporary wooden framing to hold them plumb while the concrete cures. Posts that drift while setting are a problem no amount of care later will fix.
- Pour the concrete and allow it to cure before anything is hung on the posts.
- Start with the top cabinet and work down.
- Stand the cabinet on the ground with the posts behind it before lifting anything.
- While it is still on the ground, assemble the mounting clamps for that cabinet - two per post - and attach them loosely, with the rods and brackets wrapping around the backs of the posts.
- Lift the cabinet to height with a crane or hoist.
- Tighten the clamps with a 3/4-inch SAE wrench or socket.
- Repeat for each cabinet below.
Two practical notes. A crane or hoist is required for anything but the smallest cabinets, so site access matters as much as the lift itself. And once the concrete has cured, it is common to complete the installation of a football scoreboard in a single day - the waiting is in the concrete, not in the sign.
Wiring: Power and Data
Power. Every scoreboard in the football line runs on ordinary single-phase 120 VAC. The usual outdoor arrangement is a disconnect switch mounted on one of the support posts, branching from an externally mounted panel that also serves stadium lighting. The terminal block where the alternating current is connected sits inside the scoreboard cabinet itself, not in a separate enclosure on the ground - and power does not come from the press box, which holds the console rather than the supply. The cabinets must be properly grounded, and Electro-Mech recommends a dedicated breaker for the display.
The manuals also recommend disconnecting the scoreboard from power when it is not in use, using that switch, so that in the off position all load-carrying conductors are isolated. The reason is lightning and power fluctuations travelling along the cables.
Data. Either a wireless link, with a working range of about 750 feet, or a shielded two-conductor cable with a drain line purchased separately, with runs supported to 1,000 feet. The outdoor cable carries a burial quality jacket, so the buried portion of a run does not need conduit - trench it, lay it in the dirt, and use conduit only where the cable comes up and is exposed.
One rule governs the cable wherever it goes: control cable and power never share a conduit, and distance should be kept between parallel runs. Where junction boxes are used, keep them somewhere dry and clean if possible, in a weather-tight enclosure if not, and label them - the connectors used for scoreboard data resemble those used in some audio systems, and plugging an audio device into a data line can damage the system.
Permits, and When an Engineer Is Involved
Whether a building permit is required depends entirely on the jurisdiction, and in many places a scoreboard goes up without one. The manuals put it plainly: it is possible that a government agency such as a local city council will require a permit or other approval documentation for the installation and operation of the scoreboard, and the first step is to find out what your locality asks for.
Where a permit is required, the local code may or may not have anything to say about the structural or electrical detail. What comes up occasionally is a requirement that a locally licensed Professional Engineer review the mounting structure and footings, provide wind load calculations and stamp the drawings - and the manuals note this is particularly common in coastal regions where hurricanes are a concern.
To put the frequency in perspective, a licensed PE is brought in on fewer than one hundred Electro-Mech projects a year. Determining whether one is required is the customer's responsibility rather than the manufacturer's. Where one is needed, Electro-Mech can usually help by working with the PE directly to keep the process moving - but the stamp is not the manufacturer's to give.
Before the Scoreboard Arrives
- Have somewhere to keep it. Clean, dry and secure. Shipments frequently arrive before a site is ready, and that is fine as long as somewhere sensible is waiting.
- Check the delivery. Note any shipping damage on the delivery receipt before signing it.
- Confirm the documentation matches your project. The dimensions in a manual are specific to the standard configuration of that model. If your order includes ID panels or a special mounting arrangement, verify the details with the factory before buying materials.
- Book the electrician for the day of the lift. So the operational test happens while the installer is still on site.
- Confirm access. Whether the crane can reach the position, and whether anything - a fence line, a soft verge after rain - stands between the road and the end zone.
Commissioning
Before the electrician leaves the site, run a full operational test from the console: every digit, the clock, the play clocks if they are part of the order, and the horn. Problems found while the truck is still in the parking lot are problems that get solved that day.
Then set what the operator will need: brightness levels for daylight and for evening from the fifty the console offers, the horn behaviour, and - if the field hosts track - confirmation that the clock configuration is the one you ordered. Show two people how to run it rather than one.
Finally, walk the stand and read the face from the seat that is genuinely farthest, and from the corners. That is the moment to discover a sightline problem, while the hoist is still on site.
What Goes Wrong, and When
Installations that give trouble usually do so for one of a small number of reasons, and all of them are decided before the concrete is poured.
- Posts that do not fit the clamps. Discovered on lift day, when it is expensive. The cross-section limit is in the manual for the model.
- Posts that drift while the concrete sets. Temporary framing is the answer, and skipping it is the classic false economy.
- Footings sized by weight rather than by area and wind. A wide sign in an exposed position needs more than its weight suggests.
- Access nobody checked in the wet. A verge a truck crosses in July is not necessarily a verge it crosses in November.
- Data and power in the same conduit. A specification error to correct before anything goes in the ground rather than after the first intermittent fault.
- Documentation for the wrong configuration. Manual dimensions describe a model's standard configuration. Projects with ID panels or special mounting need details confirmed with the factory first.
The pattern is that almost every avoidable problem is a planning problem, and almost none of them is a scoreboard problem. That is the argument for spending an hour on the location, the posts and the footing design before spending a day with a crane.
ID Panels, Play Clocks and Other Things on the Same Site
A football installation is rarely just the main scoreboard, and the additions change the structural conversation rather than sitting alongside it.
ID panels carrying a school name, a mascot or a sponsor's message are ordered as part of the model rather than bolted on afterwards: a cabinet with a built-in identification panel on the left, the right or both is designated -L, -R or -LR, which adds feet of cabinet, changes the weight and moves the mounting hardware positions. Because footings are sized against sign area, panels feed straight back into the depth of the footings and the size of the posts. Decide about them before the structure is designed.
Play clocks are separate products, sold as a set of two because a field needs one at each end. The permanently mounted versions go on a single post each, and they are light - 30 to 45 lbs. per cabinet, drawing less than half an amp. Their data and power runs are their own, which is worth planning at the same time as the scoreboard rather than as an afterthought a season later.
A practice segment timer may not need any installation at all: the mode lives in the football console's software, so a standard scoreboard can serve as the practice display. Where practice happens out of sight of the scoreboard, a dedicated timer on a T-Cart leg kit rolls to wherever the team is working.
The common thread is that anything adding area to the sign, or adding a display to the site, is cheaper to plan into the first installation than to retrofit. The crane is already there, the trench is already open, and the electrician is already on site.
After the First Season
Two habits keep an outdoor installation trouble-free for the fifteen years the company says the scoreboards last outdoors.
- Keep the drain holes clear. The cabinets are not sealed - they route water through and out of drain holes along the bottom, and blocking them defeats the design. If anything has been installed immediately below the scoreboard since, check that a quarter inch of clearance remains, or that the object below has matching drain holes in its top.
- Use the disconnect between seasons. Isolating the scoreboard from the supply protects the electronics from surges travelling along the power cables, which is the failure mode a rural field is most exposed to.
Beyond that, an operational test a few weeks before the season - every digit, the clock, the play clocks, the horn - catches anything that developed over the summer while there is still time to do something about it.
A closing word on sequencing, because it is where most of the avoidable cost lives. The two numbers that must be settled before any digging are the post spacing your model's clamps expect and the footing design the local wind load requires. Everything else - the lift, the wiring, the commissioning - is ordinary work that a competent installer does routinely. Get those two right and the installation is a day; get either wrong and it becomes a season.
If the project also includes ID panels, a special mounting arrangement or an existing structure you want to reuse, raise it with the sales representative before the cabinet is built. The factory can accommodate a great deal at that stage and very little afterwards, and that single conversation prevents most of the difficult installations this guide describes.
One more thing worth building into the schedule: book the electrician for the same day as the lift wherever possible. A scoreboard hung and not connected is a scoreboard nobody can test, and the operational test is what turns an installation into a working sign. Every digit, the clock, the play clocks if they are part of the order, and the horn - while the installer is still on site and the truck is still in the parking lot.
That single overlap in scheduling is the difference between finding a problem on installation day and finding it on the Friday of the first home game.
Two steel posts, eight clamps, a day with a crane and an electrician who arrives on the same morning. That is the whole job, once the planning is right.
Everything in this guide comes from the owner's manuals for the models themselves and from the way these installations actually go at fields around the country. Where a detail here differs from the manual that ships with your scoreboard, the manual for your model is the authority - the dimensions are specific to the standard configuration of that particular product, and the factory is the place to confirm anything about a customised one.
A final planning note for schools working to a season deadline. The concrete is the fixed cost in time: footings need to cure before anything is hung on the posts, and no amount of scheduling pressure changes that. Working backwards from the first home game, the sequence that fits comfortably is location and posts agreed early in the summer, holes and concrete with several weeks in hand, the lift and the electrical connection on the same day once the footings are ready, and the operational test immediately afterwards. Programmes that miss a season almost always miss it on the concrete rather than on the scoreboard.
Key Takeaways
- The factory supplies the cabinets and the mounting clamps; the site supplies the posts, concrete, lift and electrical connection.
- Clamps attach the cabinets without welding, drilling or fabricating brackets, and tighten with a 3/4-inch SAE wrench.
- Post spacing is model-specific - twelve feet centre to centre on a large football cabinet - with a cross-section no greater than 7-1/2 inches.
- Good post choices named in the manuals: 6-inch Schedule 40 pipe, a W6x25 I-beam, or 7-inch square tube with quarter-inch walls.
- Footings are sized by the surface area of the sign and the local wind load, not by the weight of the cabinet.
- Hold the posts plumb with temporary framing while the concrete cures, and assemble the clamps on the ground before lifting.
- Control cable and power never share a conduit; the outdoor data cable's burial jacket means the buried run needs no conduit.
- A permit depends on the jurisdiction, and a licensed PE is involved on fewer than one hundred projects a year.
None of this is exotic work. It is a sign on two posts, installed by people who erect signs, with two numbers that must be right before the digging starts: the post spacing your model's clamps expect, and the footing design the wind at your site requires.
Planning an installation? Request a quote from Electro-Mech and include your field, your mounting situation and whether ID panels are part of the order.
Frequently Asked Questions
What kind of posts does a football scoreboard need?
Two steel posts strong enough for the load and small enough to fit inside the supplied mounting clamps. The manuals name 6-inch Schedule 40 steel pipe, a W6x25 I-beam or 7-inch square tube with walls at least a quarter inch thick as good choices, with a maximum cross-section of 7-1/2 inches on a large football cabinet.
How far apart do the posts go?
It is model-specific and given in that model's manual - twelve feet centre to centre on a large football scoreboard. Confirm the figure before any holes are dug.
How deep do the footings need to be?
That follows the surface area of the sign and the local wind load requirement rather than the weight of the cabinet, so it is a local question. The taller the sign, the larger the posts and footings need to be, and coastal wind ratings drive deeper footings far more often than cold winters do.
Does the scoreboard bolt to the posts?
No. It clamps to them - two clamps per post, assembled loosely while the cabinet is on the ground and tightened after the lift with a 3/4-inch SAE wrench. There is no bolt pattern to match and no welding or drilling on site.
How long does installation take?
Once the concrete footings have cured, it is common to complete the installation in a single day. The waiting is in the concrete and in any permit the jurisdiction requires.
Where should the scoreboard face?
In the United States, put it on the south or west side of the field facing north or east, to keep the setting sun off the face during afternoon games. Elsewhere, the general advice is to avoid facing the sun.
How far can the scoreboard be read from?
Plan roughly 25 feet of viewing distance per inch of digit height. Electro-Mech recommends that figure rather than the sign industry's 50 feet per inch because a scoreboard has captions to read as well as digits - a model with 24 in. and 18 in. digits reads comfortably from 450 feet.
Do I need a permit?
It depends entirely on the jurisdiction, and in many places no permit is required. Where one is, the code may also call for a locally licensed Professional Engineer to review the structure and stamp the drawings, which is most common in coastal regions. Confirming the requirement is the customer's responsibility.
Who should do the work?
Electro-Mech recommends a reputable sign installer with the equipment and experience for digging, pouring, lifting posts and lifting cabinets. In some regions the company has long-standing relationships with specialists, and a sales representative can point you to them.
Can the power come from the press box?
No. The press box holds the console. Power for the scoreboard usually comes from an externally mounted panel through a disconnect switch on one of the support posts, with the terminal block inside the scoreboard cabinet itself.
AI Summary
AI Summary: Installing an Electro-Mech football scoreboard means two steel posts set in concrete footings, with the cabinets clamped to them - the factory supplies the cabinets and the mounting clamps, the site supplies posts, concrete, the lift and the electrical connection. Post spacing is model-specific (twelve feet centre to centre on a large cabinet) with a cross-section no greater than 7-1/2 inches; good choices are 6-inch Schedule 40 pipe, a W6x25 I-beam or 7-inch square tube with quarter-inch walls. Clamps attach without welding or drilling and tighten with a 3/4-inch SAE wrench. Footings are sized by sign area and local wind load rather than cabinet weight. Hold posts plumb with temporary framing while concrete cures, assemble clamps on the ground, then lift with a crane or hoist. Power is 120 VAC through a disconnect switch on a post, control cable never shares a conduit with power, and a permit depends on the jurisdiction, with a licensed PE involved on fewer than one hundred projects a year.