
Home / Documentation / Control console manual
Download the original PDF (1434 kB)
This page reproduces the text of the PDF above without alteration, so the document can be read, searched and linked to directly.
- Type
- STATP
- Options
- 0000
- Version
- CXvF / CX_Stat811.HEX
The above information should match the label on the bottom of your control console.
The purpose of this handbook is to explain how to use and maintain the Electro-Mech MP-Style scoreboard control console for model LX2055 and LX2056 Statistics Panels. The explanations and examples are based on the CX-Series console driver hardware loaded with software version 8.1.1. Earlier versions of our hardware and software behave similarly, but not identically in all situations.
Scoreboards supported by this combination of hardware and software include these Electro-Mech models:
Seven Ways to Stay Safe and Make Your Console Last Longer
1 - Don't remove the grounding pin from the power cord. It's there to help keep you from getting shocked. If your receptacle only handles two-pronged power cords then your wiring was probably installed sometime before President Hoover left office. It's time to upgrade.
2 - Keep your console dry. We've designed our consoles with outdoor activities in mind, but find some shelter if it is raining. The box is not waterproof. Drinks spilled over the keypad can lead to trouble too.
3 - Unplug both the power and data cables when you are not using the console. Noise over these cables ─ either from lightning, glitches in the power line, or some other accident ─ can damage the console. Leaving the console connected 24-7 just increases your risk of getting it fried.
4 - Store the console in a clean, dry, secure area. Leave it where somebody can kick it, drop it, pile stuff on top of it, or steal it, and you can expect your console will get kicked, dropped, piled on, and stolen. See also the "keep your console dry" tip above. Neither sprinkler systems nor natural sources of precipitation are beneficial to your control console.
5 - If you must open the console box, unplug the power and data cables. Yes, it is possible to get shocked if you go poking around inside the console.
6 - Don't plug something into the console that doesn't belong there. Those stereo connectors in the back plate of the console are the same kind used by audio equipment. The RJ-45 connectors for the handheld devices are the same type you often see in wired computer networks. Accidently plugging an audio amplifier or Ethernet access point into your scoreboard control console can cause problems ─ both to your console and to your audio and networking equipment. A common mistake we see our customers make is to accidentally plug public address equipment into the junction box which leads to the scoreboard display. This often fries components in the display.
7 - Check out your equipment before game day. We're always happy to answer questions, walk you through solutions, repair damage, or send replacement parts. But if your game starts in ten minutes, there is often not much we can do to help you. Make sure your scoreboard system is in good working order a few days before the game so that, however unlikely the chance of a problem, there will be time to solve it.
Console Parts and Accessories
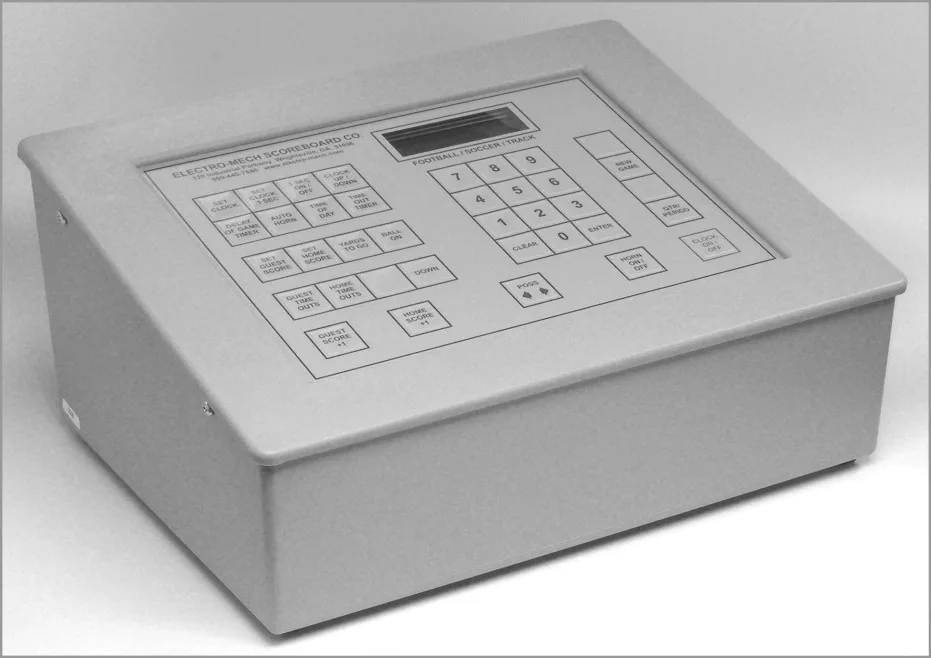
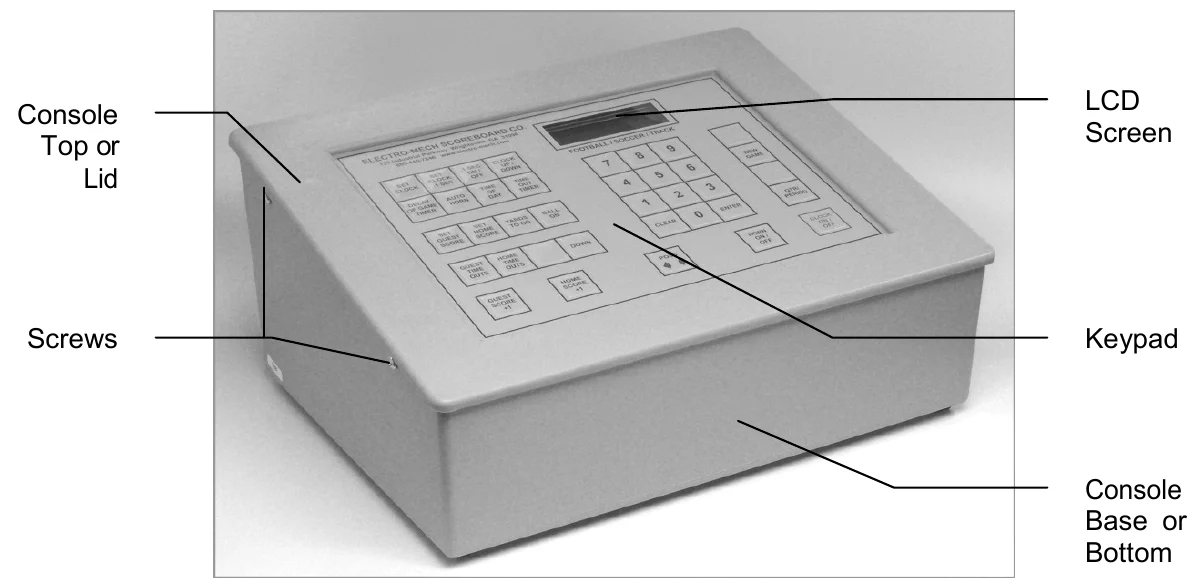
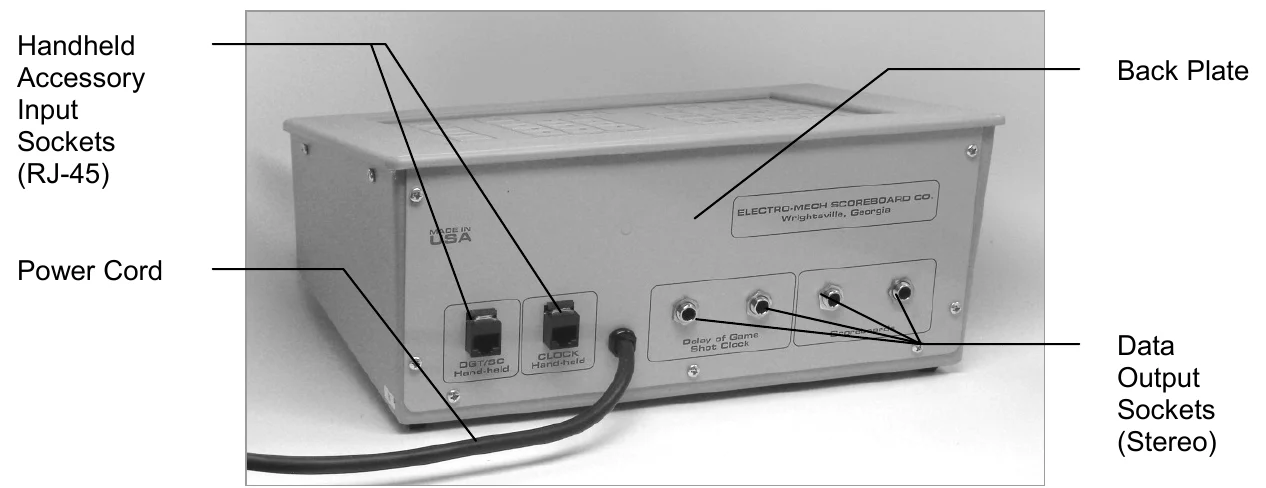
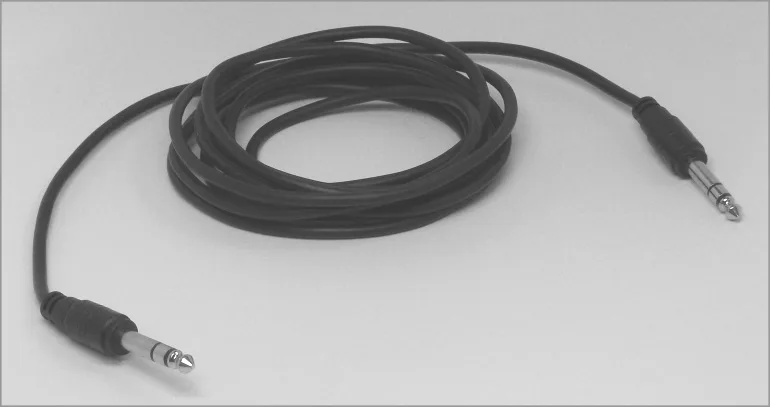
This is a generic set of photos identifying parts of the console and accessories. Your configuration may be different. You should receive a packing slip or other paperwork with your order listing which specific parts you are supposed to have.
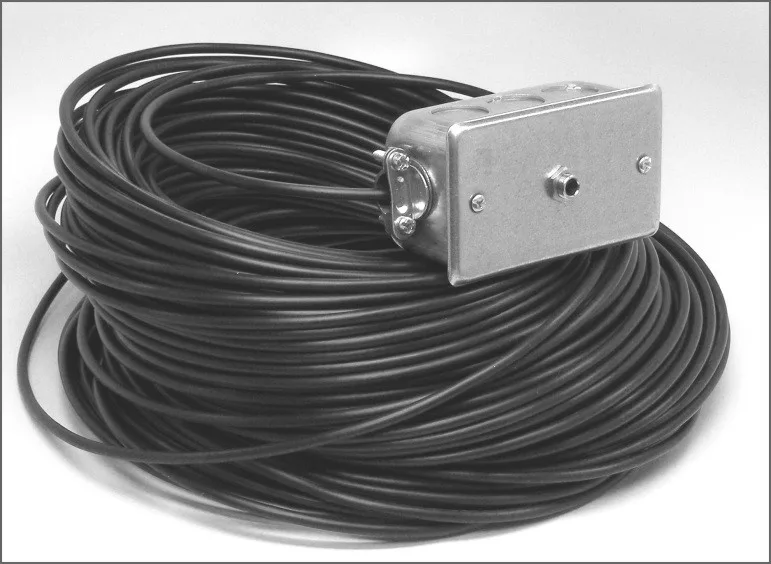
Hooking Up and Powering Up the Console and Accessories
1 - Apply power to the scoreboard display.
2 - Place the console on a sturdy desk or table so that you have a clear view of the game's action as well as the console's keypad and LCD screen. You may hold the console in your lap, if you find it comfortable to do so.
3 - For wired systems, attach one end of the stereo data cable to one of the four data output connectors on the back plate of the console. Your console may have two outputs designated for the scoreboard and two for Play Clocks or other optional displays. It doesn't really make a difference; all four outputs are the same. If you have multiple displays, go ahead and hook them up to whichever outputs are convenient.
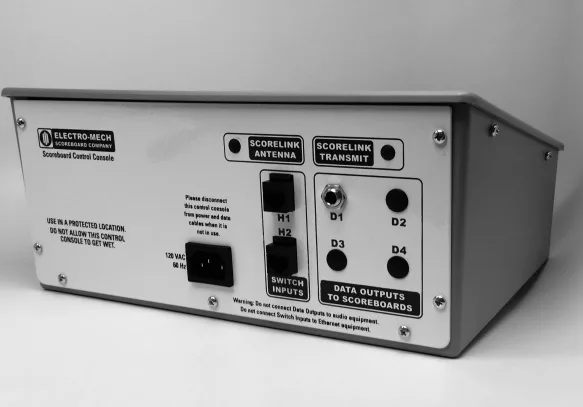
4 - Attach the other end of the stereo data cable to the junction box. If you have more than one scoreboard or optional display, each one will typically have its own junction box and its own stereo data cable. If you have the ScoreLink wireless RF system, refer to the ScoreLink owner's handbook for details.
5 - Plug in the console power cable to a standard electrical outlet.
About one out of every few hundred customers asks us the question, "How do you turn the console on and off?" There is no power button on the console. If it's plugged in, it's on. The logic here is that, for most installations, the scoreboard system is not used very often. During the down time, the console needs to be disconnected from the scoreboard display and from power to prevent damage from line noise and power surges. A power switch would discourage that good habit and provide a false sense of security.
Likewise, the scoreboard display should be disconnected from power when not in use. Therefore the console has no means of turning the scoreboard system on or off. However, a freshly powered on scoreboard display will show no information until it receives a good signal from the control console. So in order to "turn on" the scoreboard display, you have to power up and connect the control console.
Control Console Initialization
| When you first power up the console, the LCD display will show a splash screen. Be | ||||
| quick. You only have about three seconds to see these details. The LCD should look | ||||
| like this: | ||||
| ELECTRO-MECH 811 | ||||
| SCOREBOARD STATP | ||||
| The splash screen is telling you three things: | ||||
| The software author | ─ | ELECTRO-MECH | ||
| The software version | ─ | 811 | ||
| The scoreboard type | ─ | SCOREBOARD STATP |
ELECTRO-MECH 811
SCOREBOARD STATP
This information is important for diagnostics, and you can get back to this splash screen by pressing [NEW GAME] [1] [ENTER] on the keypad. If you see something different during boot-up on your LCD screen, either this is the wrong owner's handbook for you, or your console is not configured to the expected standard.
If your console contains data from the previous game, you will see a prompt offering to restore that data:
RESTORE GAME?
1=YES  0=NO  <1>
Press [1] [ENTER] to reload the old Rosters and Stats. Press [0] [ENTER] to clear out memory and start over fresh. If you do not respond to this prompt, the console will restore the previous game data automatically after a few seconds.
If you don't restore data from a previous game, the console will prompt you to choose a sport (Volleyball or Basketball):
SELECT GAME
VBALL=1 BBALL=0
By default, the console will continue in Basketball Mode if you ignore this prompt for a few seconds. You can also make an explicit selection by tapping [0] [ENTER] for Basketball or [1] [ENTER] for Volleyball. In either sport mode, the behavior of the console is essentially the same. The key difference is that in Volleyball Mode you can track six Active (on the court) Players per Team versus five in Basketball Mode. In theory you are keeping up with Kills and Digs in Volleyball Mode instead of the Points and Fouls collected in Basketball Mode. But this is just a way of labeling the numbers; there is no practical distinction in the way the console interprets these two pairs of statistics.
| You are ready to begin tracking Player Stats when the LCD looks like this: | ||
| 000 00 | 00 000 | |
| GUEST | _ _ 00 00 | |
| Your console may show HOME instead of GUEST when you initiate a new game. |
000 0000000
GUEST0000
Control Console LCD Screen
The LCD screen primarily provides a summary of current Stats. Unless you are updating information through one of the interactive prompts, you will see text and numbers on the LCD screen which are arranged like the characters in the example below. The top line of numbers represents Team Totals. The bottom line gives you information about the Current Player and the Roster (Guest or Home) to which that Player belongs.
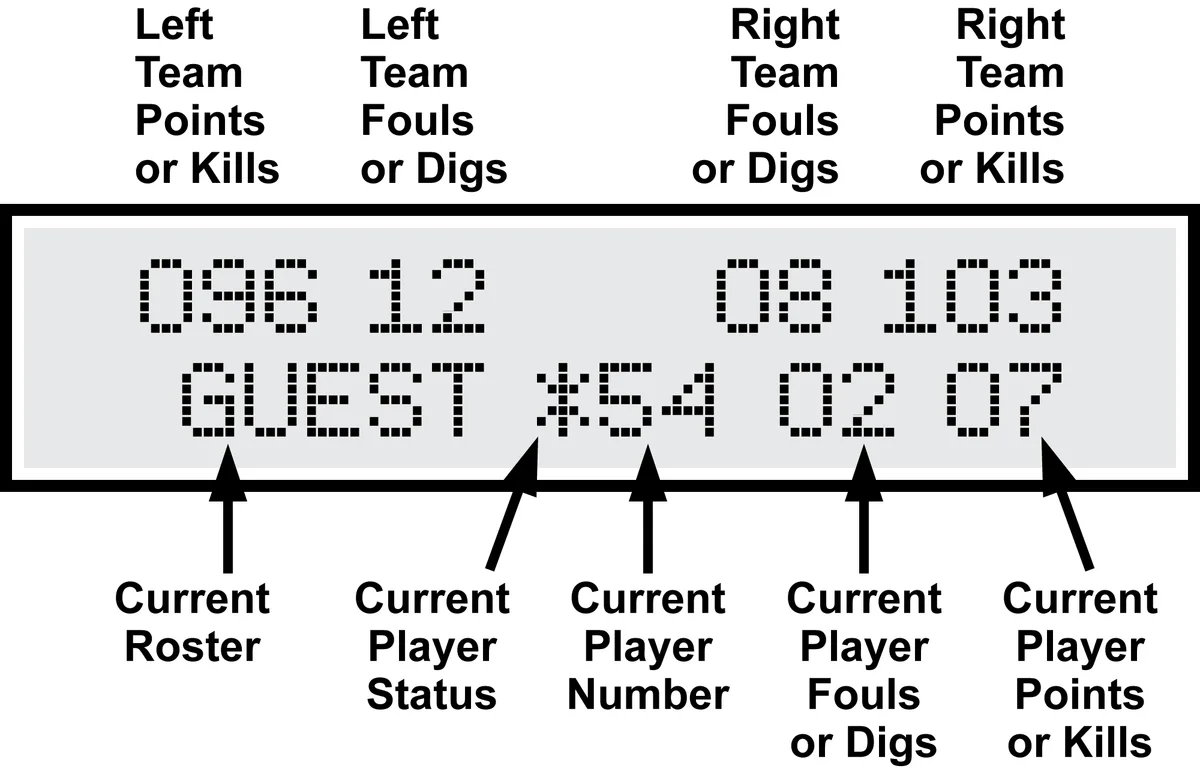
The illustration above refers to "Left Team" and "Right Team" to be as generic as possible. In most cases, the Left side is for the Guest team and the right side is for the Home team. Some scoreboard/console pairs ship with the positions swapped. Adding a jumper to the "H" pins on the CX driver PCB inside the control console assigns Home to the left side.
The asterisk indicates an Active (on the court) Player Status. The Stat Panel scoreboard display shows Active Players. You will not see Inactive Players on the Stat Panel display, and they will be listed without an asterisk on the console's LCD screen.
Because operation of the Stat Panel is typically not the responsibility of the person operating the main scoreboard display, the data collected for the Stat Panel system is separate from the data shown on the main scoreboard display. The Team Totals shown on the top line of the LCD are not linked to the Team Totals shown on the main scoreboard. The Stat Panel control console tracks and shows you this information primarily to help you identify data entry errors which might happen in either system.
Key-By-Key Operation
This section will provide a key-by-key explanation of the console features. Use the [0] ... [9] buttons to respond to prompts, pressing [ENTER] to complete or confirm your response. The [CLEAR] button backs you out of a prompt without making changes.
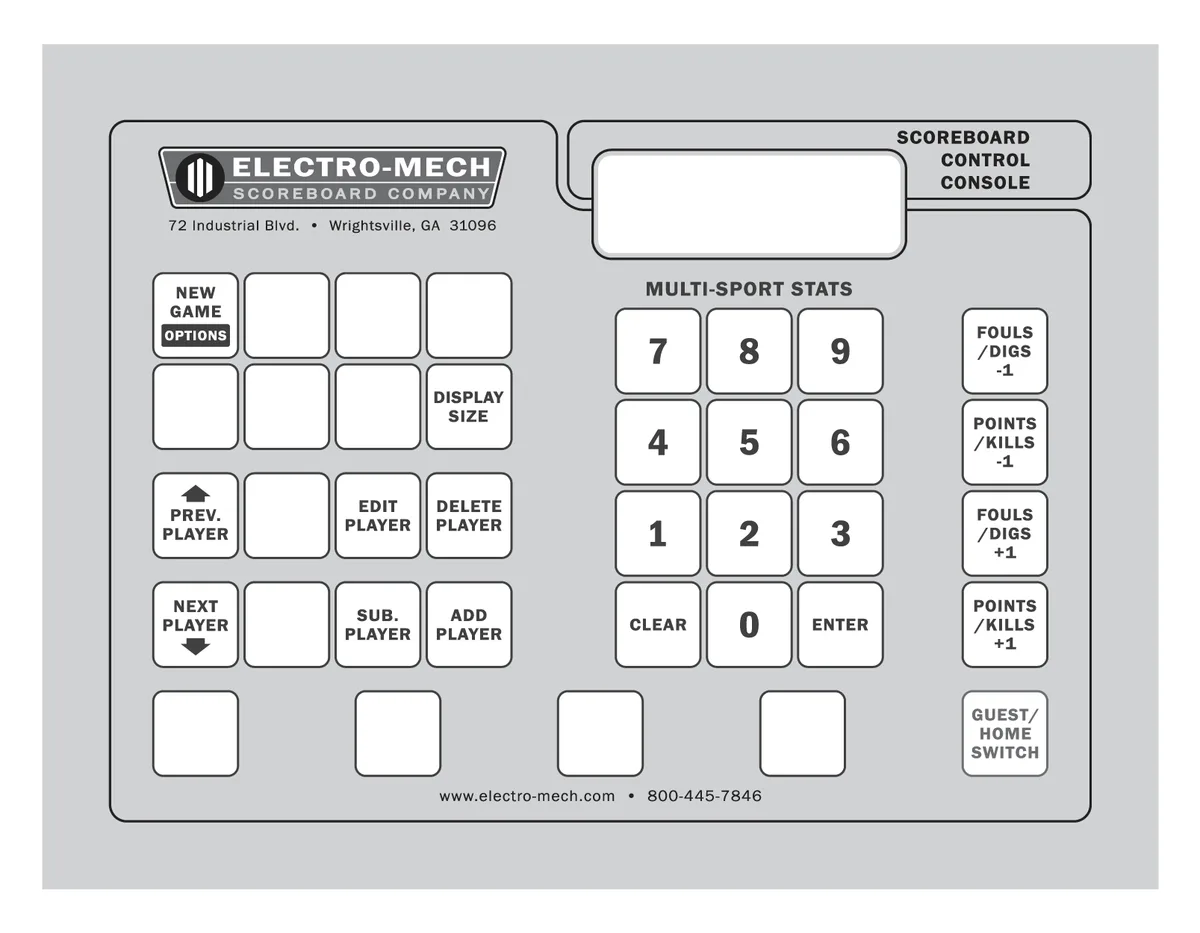
[GUEST/HOME SWITCH] - Use this button to toggle the Roster showing on the bottom line of the LCD screen. While it doesn't affect any Stats directly, it determines which Team's Stats are affected by most of the other buttons on the keypad. For example, if the LCD shows HOME on the bottom line and you want to add Points scored by a Player on the Guest Team, tap [GUEST/HOME SWITCH] to toggle over to the Guest Roster.
[ADD PLAYER] - Use this button to add a Player to a Roster. When you start a new game, you will go here first to create the Player Roster for each Team. When you tap [ADD PLAYER] the new Player's Team corresponds to the Current Roster showing on the bottom line of the LCD screen. If you want to add a Player to the Guest Roster, but HOME is visible on the bottom line of the LCD, you will need to tap [GUEST/HOME SWITCH] to make the Guest Roster the current one.
The Add Player function will ask you for two pieces of information. First you need provide the Player's jersey Number. Then you will need to set the Player's Status to Active or Inactive. Active Players are the ones on the court (or the first ones heading to the court as you set up the Roster prior to the start of a game). These are also the Players which will be listed on your Stat Panel scoreboard display. Inactive Players are not on the court. The console remembers any Points and Fouls assigned to Players whether they are Active (showing on the Stat Panel scoreboard display) or Inactive.
The prompt for Player Number looks like this:
PLAYER # <??>
To add Player #36 (Meadowlark Lemon), tap [3] [6] [ENTER] at this prompt. It's important to know that the console treats leading zeros differently from leading blanks. In other words, you can have a Player "3" and a Player "03" as two separate Players on the Roster.
If you try to add a Player whose Number is already listed in the Roster, you will get an error message:
DUPLICATE NUMBER
This message will go away within a few seconds.
After you provide the Player Number, you will see a prompt requesting the Status of the Player:
ACTIVE? 1=Y 0=N
If you ignore this question or press some combination of buttons other than [1] [ENTER], the console will add the Player to the Roster and assign that Player an Inactive Status.
If the console is set to operate in Basketball Mode, it will only allow five Active Players. Attempting to add a sixth Active Player will produce an error message:
PLAYER COUNT!
This message will go away after a few seconds. The Player will be added to the Roster, but with an Inactive Status. In Volleyball Mode, you can have six Active Players. Trying to add a seventh Active Player will trip the error message.
[SUB. PLAYER] - Use this button to substitute one Player for another Player. It does not make any difference whether you supply the incoming Player Number or the outgoing Player Number first.
ENTER SUB # <00>
To send in #22 (Curly Neal), you would tap [2] [2] [ENTER] at this prompt. The next prompt asks for the second Player in the transaction:
PLAYER # <00>
If Meadowlark Lemon is the Player coming off the court, you would tap [3] [6] [ENTER]. If either Player Number doesn't match a Number in the Roster, you will see an error message:
NO ROSTER #
Keep in mind that the console treats single-digit Player Numbers like "2" as separate from Player "02" which includes a leading zero.
Inside the control console, the mechanics boil down to swapping the Status of the two Players. While it wouldn't make any sense in the context of the game to substitute one Player on the bench for another Player on the bench, the console will allow you to do this. In this scenario, the console would "swap" the Inactive Status of the first Player for the Inactive Status of the second Player ─ which results in no change to either Player. But when you substitute an Inactive Player for an Active Player, you've traded the Status of each Player in a manner which applies logically to Basketball or Volleyball. Because of the way the console handles this transaction internally, it doesn't matter which Player Number you enter first.
[NEXT PLAYER] & [PREV. PLAYER] - Use these two buttons to scroll through the Players in the Current Roster. The Current Player is the one whose number is displayed on the bottom line of the LCD screen. The Next or Previous Player on the Roster depends on the order of the Roster and where the Current Player happens to be positioned. The top positions in the Roster are reserved for Active Players. If your five Active Basketball Players are #44, #31, #5, #10, and #14, they will be listed in order by Number on the Stat Panel scoreboard display and occupy the top five positions on the Roster. (1) = #5 (2) = #10 (3) = #14 (4) = #31 (5) = #44 In this scenario, if Player #14 is the one shown on the LCD screen, [NEXT PLAYER] would move down the list to #31, while [PREV. PLAYER] would move up the list to #10.
Below these top spots in the Roster, the Inactive Players are ordered by Number. The Roster is a circular list, so the "Previous Player" after the first Active Player is the last Inactive Player. And the "Next Player" after the last Inactive Player is the first Active Player.
[EDIT PLAYER] - Use this button to set the Status of a Player and to edit the number of Points or Fouls assigned to that Player. This function acts on the Current Player ─ that is, the one showing on the bottom line of the LCD screen. You may need to use the [GUEST/HOME SWITCH] button to move to the appropriate Roster and the [PREV. PLAYER] & [NEXT PLAYER] buttons to scroll through the Roster to find the Player you want to work with.
The edit function takes over both lines of the LCD display ─ showing the Player Number on the top line and cycling through the three associated Stats on the bottom line. The first Stat you can change is the Status of the Player. Here is an example using Player 4 (notice the underscore which distinguishes Player "4" from Player "04"):
  PLAYER #  <_4>
ACTIVE? 1=Y 0=N
Tap [1] or [0] followed by [ENTER] to set the Status to Active or Inactive. Even if you don't want to change the Status, you have to explicitly respond to this prompt to get to the next prompt:
PLAYER #  <_4>
 FOULS    <01>
Let's say you had accidentally assigned a Foul to Player #4 and need to correct the mistake. You can tap [0] [ENTER] at this prompt to set the Player's Fouls to 0. Or, if you don't want to change the Fouls Stat, you can press [ENTER] (or any other button that isn't a number) to skip to the next prompt:
PLAYER #  <_4>
POINTS    <06>
Here you can assign Points to the Player ─ or tap [ENTER] to accept what you see and exit the function.
In Volleyball Mode, the prompts will be for Digs and Kills. Any changes you make at the Fouls/Digs prompt or Points/Kills prompt will affect the Team Totals.
[DELETE PLAYER] - Use this button to remove a Player from the Roster. This function acts on the Current Player ─ that is, the one showing on the bottom line of the LCD screen. You may need to use the [GUEST/HOME SWITCH] button to move to the appropriate Roster and the [PREV. PLAYER] & [NEXT PLAYER] buttons to scroll through the Roster to find the Player you want to delete. The prompt looks like this:
 PLAYER #  < 4>
DELETE? 1=YES
The only way to complete the delete function is to tap [1] [ENTER] at this prompt. If you wait for a few seconds or tap any other button (besides the numbers) you will exit the function without causing any changes.
If you delete a Player who has been assigned Fouls/Digs or Points/Kills, those numbers will be subtracted from the Team Totals. If you delete an Active Player, the Stat Panel display will be updated to reflect the change.
[DISPLAY SIZE] - This button is not used for the "811" version of our Stat Panel software. It does nothing.
[POINTS/KILLS +1] - Use this button to add 1 to the Points or Kills assigned to the Current Player.
[FOULS/DIGS +1] - Use this button to add 1 to the Fouls or Digs assigned to the Current Player.
[POINTS/KILLS -1] - Use this button to subtract 1 from the Points or Kills assigned to the Current Player.
[FOULS/DIGS -1] - Use this button to subtract 1 from the Fouls or Digs assigned to the Current Player.
[NEW GAME / OPTIONS] - Use this button to access a set of special functions. The primary purpose of the "New Game" button is to allow you to clear out all Roster and Player data to start a new game. The initial prompt looks like this:
RESET SCOREBOARD
1=YES  0=NO  <0>
If you tap [1] [ENTER] at this prompt, you will clean away all the old data. However, you can tap [2], [4], or [5] to activate other options. [NEW GAME] [2] gives you control over the brightness of the LEDs in the Stat Panel display:
 SET BRIGHTNESS
MAX=100%  <100%>
The minimum brightness is 50%.
[NEW GAME] [4] blanks all LEDs on the Stat Panel display. This is intended as a test mode to identify "stuck on" LEDs.
[NEW GAME] [5] illuminates all LEDs on the Stat Panel display. This is intended as a test mode to identify dead LEDs.
Control Console Power Down and Storage
There is no "OFF" switch on the control console; nor is there a function on the console that turns off the scoreboard display. The sign should be disconnected from power when not in use. Electro-Mech recommends installing a disconnect switch for all permanently mounted scoreboard displays. You may simply unplug a portable scoreboard display and store it between games.
You should unplug your control console both from its power receptacle and from its data cable when you are not using it. Electro-Mech offers a carrying case which provides a convenient way to store and transport the console along with various cables and other accessories. Whether or not you have a case, you should store the console in a safe, dry location between games.
If the console loses its connection with the stat panel display while the display is powered, the sign will freeze up ─ showing the last known set of Players and other information it received from the console. The stat panel display will synchronize with the console again as soon as you reestablish the connection.
If the stat panel display loses power with the console still connected and powered, nothing will happen other than the display going blank. Again, the stat panel display will synchronize with the console as soon as they receive power.
If the console loses power ─ either because you intentionally unplug it or because of something unexpected ─ it will save the current game information to its internal memory. When you next apply power to the console, the LCD will prompt you to restore the previous game. If you fail to respond to the prompt, the game data will restore automatically after a few second.